Photoshop + Image Masking
Sunday, October 23, 2005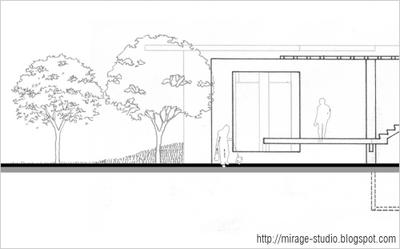 When it comes to presentation, inserting raster images of human and trees gives it an overall feeling of liveliness. The whole idea is to counter the mono tone feeling of line drawings, especially when it comes to presenting your work to someone who is not in the architecture line of field.
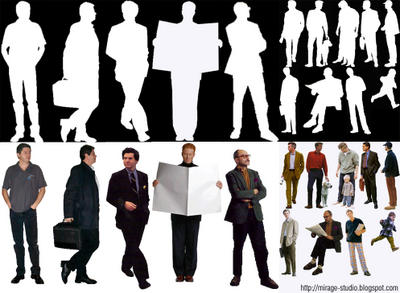
I have included a few of my collection in jpeg available for download at the end of this article. Each image shows a person on a white background and another one with a cut-out version. For those who are still relatively new to Photoshop or this is your first year as an architecture student, a step by step tutorial on how to insert the image into your presentation boards is available.
(1) Select (ctrl + a ) then copy (ctrl + c) the image and paste (ctrl + v) it into the presentation board from the source.
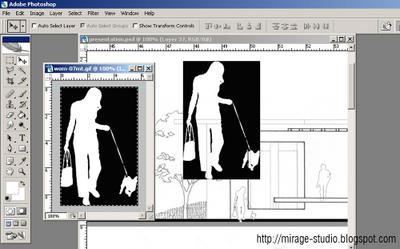
(2) Select the magic wand tool (press W) then click on the black area, to select multiple area hold down the ctrl key and click on multiple areas.
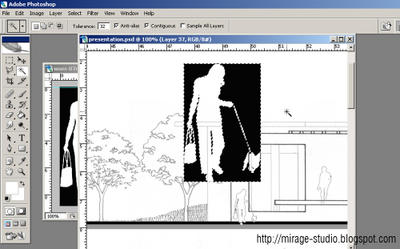
(3) Select all of the black colour areas then delete (press the delete key) or go to "edit" then select "clear" to delete the selected areas.
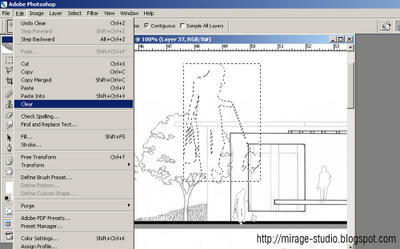
(4) Deselect the area by pressing (ctrl + d) or go to "select" then "clear".
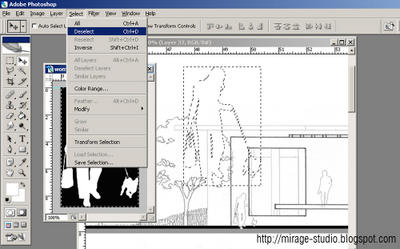
(5) In the layer toolbox, right click on the selected layer then choose "Blending Option"
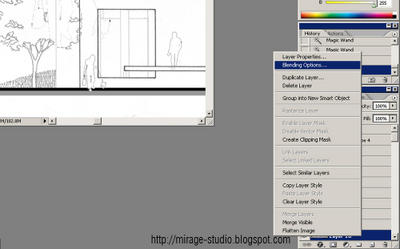
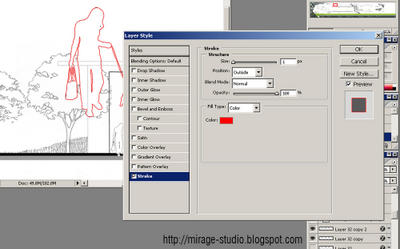
(6) In layer style dialog , under the styles category select "stroke", then put the line thickness to 1. By default the colour is red, change the colour to suit your presentation boards.
(7) Resize (ctrl + t) the image to scale, go to "edit" then "transform" and select "scale"
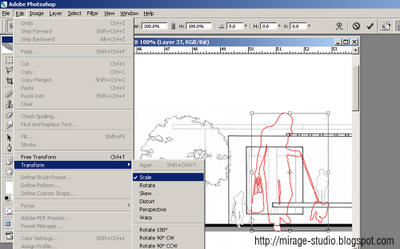
Creating a "cut-out" or "floating image" of any of the image objects supplied below is a simple 7 step process. The step by step tutorial above gives an overview of the whole process using Photoshop. Click on both the images below for a higher resolution. For cut-out version of trees browse to the previous post - Architecture Trees Sketches


October 24, 2005 12:53 pmvery helpful, thank you!!
» Post a Comment