Gradient Masks over AutoCAD with Photoshop
Sunday, October 16, 2005
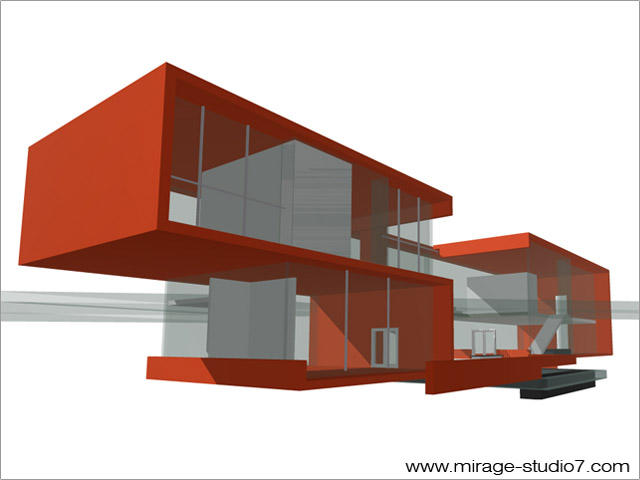
In order to blend both of the images, you have to export them in the same exact view. To capture both views you can use any CAD software offers, In AutoCAD and Architectural Desktop, you can Plot a Hidden Wireframe to a .tif file and Render to a .tif file format as well to get really high resolution images. (click on the image below for a larger resolution, then save it into your comp for tutorial )

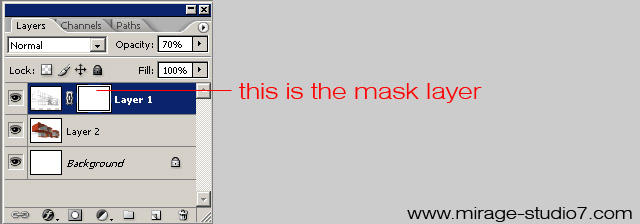
With both the images from your CAD program, import them into Photoshop and put them on separate Layers. Typically I like to put the Wireframe on top of the Shaded or Rendered image but it is not necessary to follow my preferences.
Align the images by adjusting the Transparency Bar on the top Layer so you can see both images blended at the same time. Zoom in to match the Wireframe up against the Shaded or Rendered image. After the alignment, please remember to set the opacity back to 100%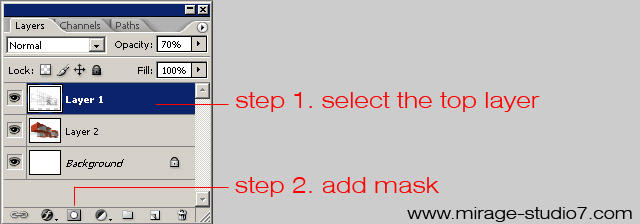

After adding a Mask to the current selected Layer, use set the Paint Bucket tool to a Gradient tool and make any adjustments you see fit. The Color should be set to Black. You can always adjust the falloff of the gradient by double-clicking on the gradient drop-down.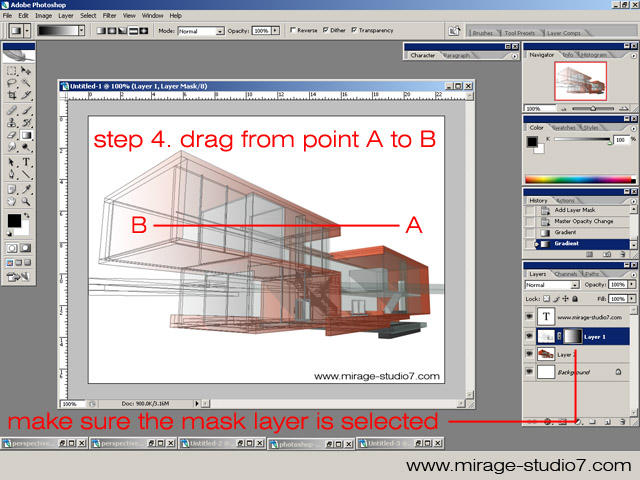
With the Gradient Tool set, select two points across the image and withness the gradient results immediately, illustrated example can be seen at the image above. If you increase the distance the falloff should be stretched and less drastic while decreasing the distance should create a dramatic falloff as illustrated to the right. Recomended to use the Shift key while drawing the gradient line inorder to create a straight gradient.
This entry was posted
on Sunday, October 16, 2005 at 4:02 am.
You can skip to the end and leave a response.
![]()
![]()


October 22, 2005 3:03 amwow, the Gradient Mask is pretty cool! I think i'll use it for my final presentation this semester! thanks
» Post a Comment